Since there are many unusual planning aspects to this trail, I’ve created a consolidated “packing and planning checklist” if you’d like to download it. Scroll to the bottom of the post for access to it. You can also save it to Pinterest for future reference by clicking here.
In addition to this post, the following posts document our day-to-day adventures on the trail with lots more photos to give you an idea of of what the trail is like:
General Facts about the Trans-Catalina Trail
- Located on Santa Catalina Island, an island 22 miles off the shores of Southern California.
- 38.5 miles long, stretching from the town of Avalon on the east end to Parson’s Landing on the west end.
- Traverses through the 42,000 acre tract of Catalina Island Conservancy’s Nature Preserve.
- No dispersed camping. There are five campgrounds along the trail. Campsite reservations are rather pricey, in my opinion. They charge by the head, not the site. This ended up being one of the more expensive backpacking trips I’ve ever taken because of it (but it’s worth it!). Reservations can be made via phone by calling the Santa Catalina Island Company Visitor Services at: 310-510-4205 or online through Reserve America.
- Dry, exposed trail which can get very hot in the summer months. Adequate water carries are a must! Also, Parson’s Landing does not have running water other than the salty Pacific Ocean. It’s imperative you either carry what you need for 2 days (no thanks!) or conveniently have it waiting for you at the campground in a locker (more on that option below).
- Wildlife on the island includes American Bison, Southern Pacific Rattlesnakes, Santa Catalina Island Fox, as well as Harbor Seals and migrating Grey Whales off shore (we saw both!), among many other native and non-native animal species. The Bison are fairly habituated, and while it’s highly unusual, they can and will attack (a man was gored in the arm by one in a campground two nights before we arrived and had to be airlifted off the island for his injuries!).
- Very steep trail in certain sections. I wouldn’t dare hike this trail without hiking poles. Even with them, it was incredibly challenging in spots. I would only recommend this trail to someone who is in good shape and who has a high tolerance for tough hiking terrain.
- Stunning, sweeping views along many locations on the trail.
- Daily boat shuttle services from the Los Angeles area. The boats can book up so reservations are advised. The boats can also cancel their routes due to high winds (this happened while we were there and we were told it happens a few times a year), so it’s wise to build in a little extra time with your schedule, just in case.
- Hiking permits are free but required. They can be acquired online or in person at Conservancy House in Avalon, the Wrigley Memorial & Botanic Garden, Nature Center at Avalon Canyon, the Airport in the Sky, and the Visitor’s Center at Two Harbors.
- Dogs are allowed on the trail but must be leashed at all times.
- Gear shuttle services are available, if you don’t want to carry a full backpack.
- The trail is never terribly far from civilization and affords the opportunity for restaurant meals twice along its length!
- Cell reception is spotty but better than I thought it would be. We almost always had at least one bar for calling and texting, but internet access was more limited.
- Hot showers and a laundromat are both available in Two Harbors if you’re ready to wash away the grime at the during or at the tail end of your hike (change machines are available in the laundry room). There are also two laundromats in Avalon.
- If you need to get off the trail, the island’s bus shuttle system makes daily pick ups at Airport in the Sky, Little Harbor, Two Harbors and Avalon. This was attractive to me since I was taking a newbie backpacker. If she needed to get off the trail for some reason, we had “easy” options to do so.
The weather usually doesn’t vary more than 8 degrees year round. We hiked in February and it was cold at night (in the 40s), but very pleasant during the day (high 50s, low 60s).

Weather graph compliments of Catalina Island Conservancy’s website
Logistics for Backpacking the Trans Catalina Trail
I haven’t paid for a plane ticket in years. You can read all about the wonderfulness of Southwest Airlines and their easy-to-obtain Rapid Reward Points in this post. My round trip ticket cost me 14,499 points, nonstop to and from Atlanta. I challenge anyone to find a more attractive points-based fare for this length of flight, nonstop both ways, and at convenient travel times! If you have to fly to get to the Trans-Catalina Trail, I highly recommend you learn more about how to get their for free!
Since the Trans-Catalina Trail is on an island, it presents a unique challenge for reaching the trailhead. Marnie, my friend who hiked with me, and I, flew into the Los Angeles airport (LAX) and then immediately took a Super Shuttle shared-ride van to the Long Island Port to catch the ferry to the island. Our driver was very nice but very confused when we told him which part of the port we needed to head to (it’s huge!). So if you take this route, make sure you give them the address of the ferry terminal which is 320 Golden Shore, Long Beach.
Of note, it’s worth price shopping Uber/Lyft against Super Shuttle–we took Lyft back to the LAX area when we returned to the mainland and it was cheaper than Super Shuttle by about $10.
Boat Shuttle
The Catalina Express offers multiple port and time options daily but Long Beach has the most options. We took the ferry to Avalon the day before we started our hike, but the boat shuttle service runs early out of Long Beach and it’s certainly plausible to catch the first shuttle of the morning to start hiking the same day you arrive. I have heard that Groupon offers a reduced fare for the ferry, so it’s worth checking before you depart.
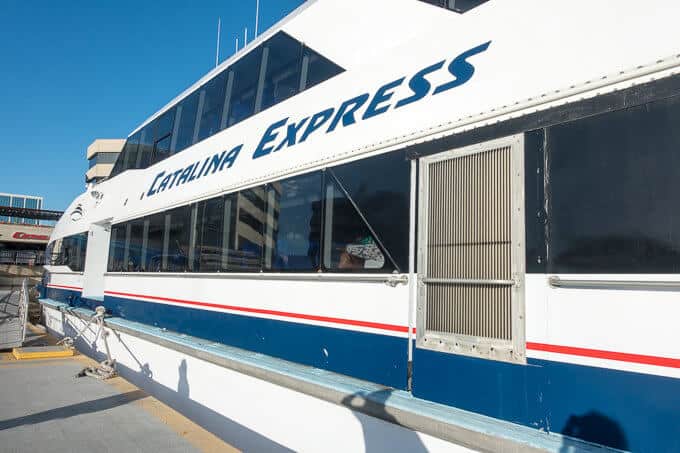
Catalina Express Ferry
The shuttle from Two Harbors, the western terminus of the trail, does not have an option to return to the Long Beach Port. So if you leave a car at Long Beach, you have to take the shuttle to and from Avalon to return to it.
You can get back to Avalon from Two Harbors via the bus shuttle system on the island, but it’s incredibly expensive ($57 one way from Two Harbors to Avalon on a school bus, essentially!). It’s wiser economically to take Uber or Lyft from San Pedro to return to Long Beach if you park a car at Long Beach’s terminal and return via the Two Harbors-San Pedro ferry.
There are not nearly as many shuttle options to and from San Pedro and Dana Point, so keep that in mind, especially on your return trip when you may waiting awhile for the next boat. Here’s a map from the Catalina Express website depicting the ports and routes.
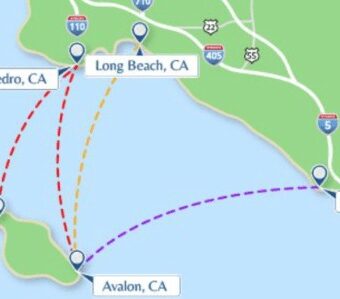
Avalon Express Boat Shuttle Routes
Itinerary and Campsites
Since this is a relatively short trail, it can be completed in as little as two days by ambitious backpackers. In my opinion, even if you can hike it that quickly, you should strongly consider taking it at a slower pace. Three of the four designated campsites are oceanfront. Need more convincing?
Our thru hike took five days and I felt that it was a perfect itinerary. We stayed in four campsites which made for a very relaxing and enjoyable experience. Our route and mileage was as follows (trail journals to detail each day’s hike are coming soon!):
Day 1: Avalon to Blackjack Campground (10.7 miles)
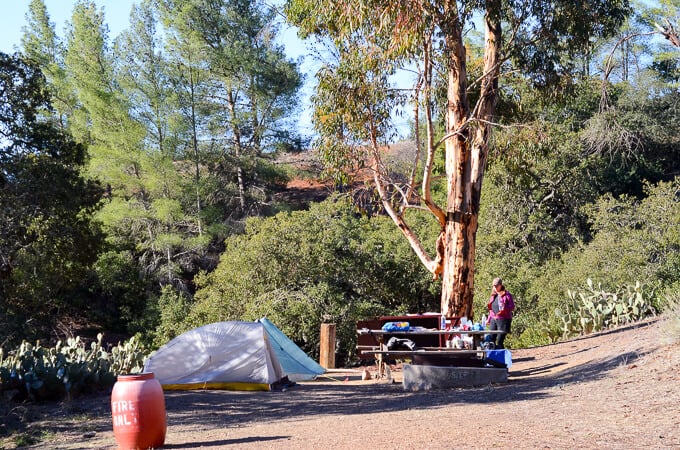
Blackjack Campground (site #3)
Day 2: Blackjack Campground to Little Harbor (8.2 miles)
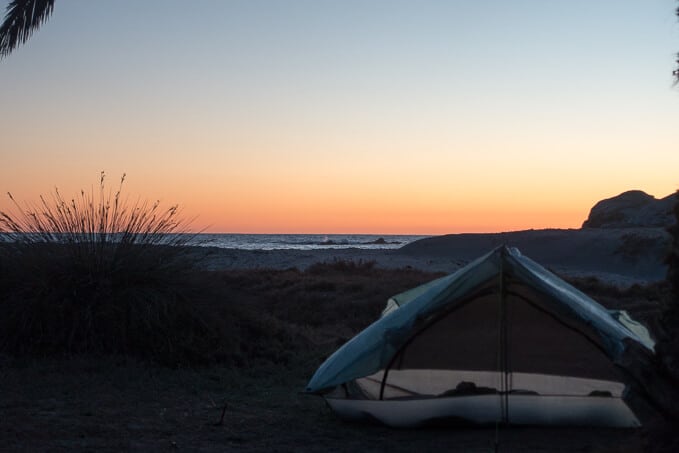
Little Harbor Campsite (site #3)
Day 3: Little Harbor to Two Harbors (5.3 miles)
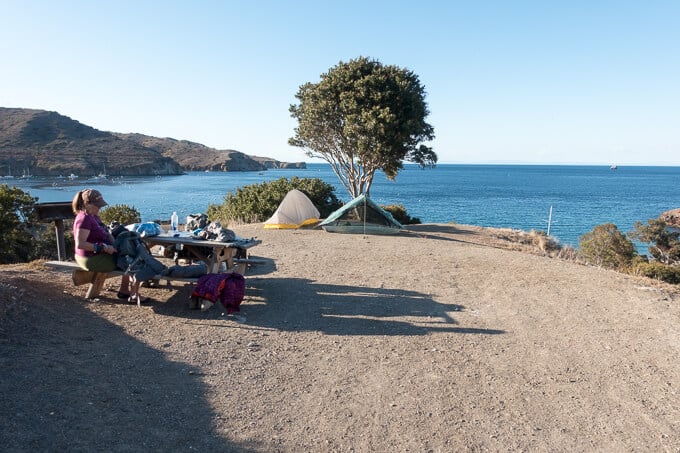
Two Harbors Campsite (site #46)
Day 4: Two Harbors to Parson’s Landing (6.6 miles)
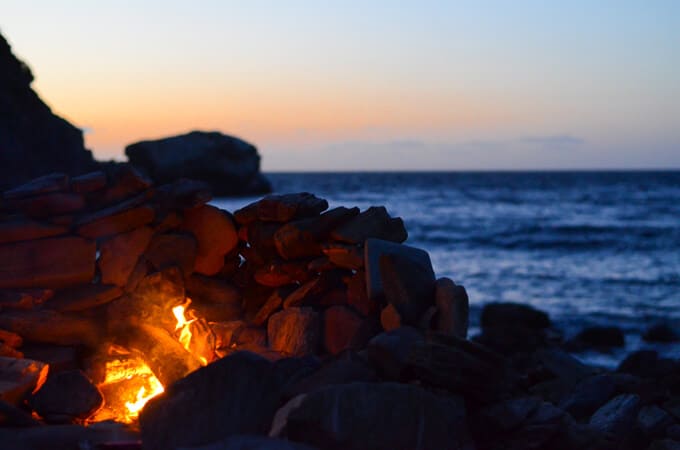
Parson’s Landing Campsite (site #8)
Day 5: Parson’s Landing to Two Harbors (7.7 miles)
Since there is no dispersed camping on the island, you must reserve all your campsites. If you make your campsite reservation online, be sure to call the Two Harbors Visitor Center at (310) 510-4205 and reserve firewood for any of the campsites where you think you might want a fire. They will deliver it to the campgrounds for you for a small fee.
Also, and this is very important: Make sure you order water for Parson’s Landing! There is no water along the trail to and from Parson’s or potable water at the campground other than what you order and have waiting in a locker for you (of note, there is potable water available at the other 3 campgrounds). The water at Parson’s Landing is a fee beyond your campsite reservation fee, so make sure you call and order it since you can’t order it online while making your campground reservations.
When you arrive in Two Harbors to check in for your campsite there (you do this at the Visitor Center at the base of the pier), make sure to pick up your locker key to obtain your water (and firewood) at Parson’s Landing. This is so important! If you forgot to order water before leaving for your trip, you can still order and pay for it when you’re there; however, this isn’t something you want to leave to chance on your memory, so I’d highly recommend ordering it ahead of time so they know to pass off a key to you when you check in for your night at Two Harbors Campground.
All of the campgrounds with the exception of Two Harbors have critter-proof boxes to store your food. A ranger told us that it was safest to store our food in our tents at Two Harbors. I was thankful that we brought odor-proof Opsaks to store our food, because I was 100% dubious that this would keep any critters from finding their way inside my unattended tent for a snack!
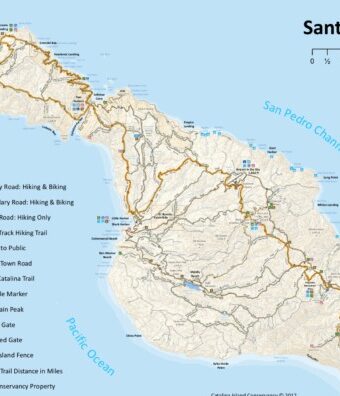
This map from the Catalina Island Conservancy is a good reason you need to purchase a bigger one in town–even printed, it’s hard to read! The trail is the orange line running the length of the island.
Here is my GPX Data, if you’re interested in downloading it. Here’s the general stats from it:
Avalon and Last Minute To Dos
We flew into the Los Angeles Airport (LAX) mid afternoon, so we opted to take the later afternoon shuttle to the island and spend the night on it before heading out the next day. We stayed at the Catalina Island Inn which was clean and quiet, but there are plenty of other lodging options in town. We had dinner at The Lobster Trap. It was essentially overpriced bar food but it hit the spot after a long day of travel.
The next morning, we stopped by the Catalina Island Conservancy to purchase a trail map ($3) which I highly recommend as the printable version online is difficult to read. The Conservancy had the best trail swag I saw on the entire island–everything from hats to hoodies to t-shirts, with clever designs and reasonable prices. They do not have an online ordering option, unfortunately, so either carry what you want to purchase or plan on getting back to Avalon at the end of your trip!
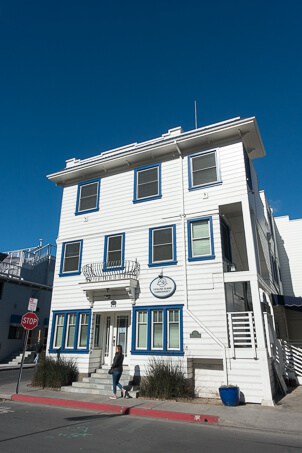
Catalina Island Conservancy’s old location–the new one is in downtown Catalina, very close to where you get off the ferry.
Fuel for my MSR Pocket Rocket was a challenge to find (you’re not supposed to bring canister fuel on the boat ferry). Von’s Express is a small grocery and supply store in Avalon, but neither location carried canister fuel for backpacking stoves when we were there. Thankfully, Chet’s Hardware came the rescue and they had it in stock!

Chet’s Hardware has fuel.
If you forgot to order firewood for any of your campsites and/or water for Parson’s Landing, you can call the Two Harbors Visitors Center before you head out as well.
Fun Food Stops Along the Trail
Between Blackjack Campground and Little Harbor, the trail passes directly by Airport in the Sky, which is a super cool airport perched at the top of the island, 1600 feet above sea level. The best part of the airport, besides watching private planes flying in and out, is DC-3 Grill and Gifts, a restaurant and gift shop that is open for both breakfast and lunch! I dare say I ate the best burger I’ve ever had here. It was made with Bison and loaded with all sorts of deliciousness–grilled onions, avocado, and cheese. They are famous for their cookies as well, but we didn’t try them. It is well worth a stop, even on day two, for a meal!
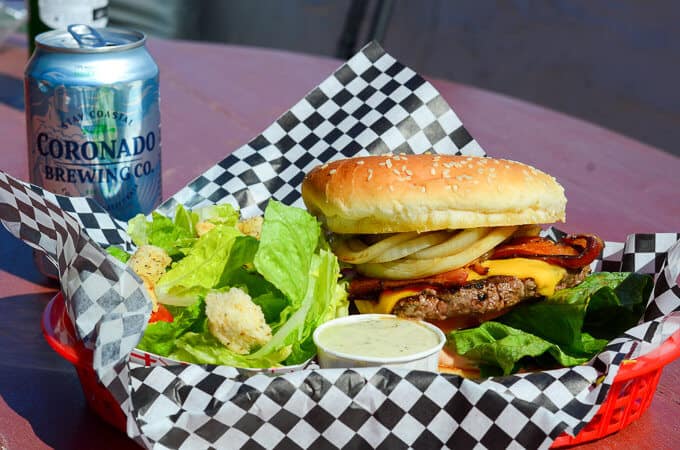
Bison burger and a cold beer at Airport in the Sky
In Two Harbors, there’s only one game in town if you’re ready for another off-trail food treat: Harbor Reef Restaurant and Bar. It’s pricey, but they do offer a happy hour from 3-5 p.m. each day and the fish and chips were delicious. They also serve a drink called Buffalo’s Milk. It’s not really made from buffalo’s milk, but apparently it’s the bomb in the world of refreshing alcoholic beverages. I regret that I didn’t try one, but I was in the mood for a cold IPA the night we ate here!
Gear Recommendations
Beyond the usual backpacking gear and the 10 essential systems you should always bring on a hike, I recommend the following additional items:
- Hiking Umbrella: I brought mine and thankfully it was cool enough that I never needed it to shade me from the sun, but I think this would be an invaluable addition to your pack if you hike the trail in the warmer months.
- Hiking Poles: They are a must on this trail. As my friend Marnie put it, some of the stretches along the trail are as steep as black diamond ski slopes–apparently that’s pretty steep (I don’t downhill ski). All I know is that I was glad I had mine or I would have been scooching down some of the hills on my butt!
- Odor Proof Opsaks for your night at Two Harbors Campground as there are no food storage boxes here.
- Blister Prevention and Care: My feet fared well, but I’m used to hiking in the mountains of western North Carolina. Marnie’s poor Florida-based feet were in rough shape by the end, so I was glad that I brought an arsenal of supplies to help prevent and treat her blisters. Leukotape, by the way, is hands down the best thing I’ve ever used to prevent blisters (immediately apply it to “hot spots” where you feel you may develop a blister soon).
- Bathing Suit, Snorkel and Mask: The winter water was too cold for these Southern Magnolias, but we’ve been told the snorkeling in each of the harbors is fantastic. It might be worth the extra weight to bring appropriate gear in the warmer months.
- Multiple Water Containers: I always use Smart Water Bottles on hikes, since they’re super light and hold a liter each. I recommend carrying at least two liters per person on this trail if you hike it during the cooler months and 3 liters during the warmer months.
- Hat, Sunscreen, Sunglasses and Chapstick with SPF Protection: These items are all part of the 10 essential systems (sun protection), but they’re worth emphasizing. You are very exposed to the elements the vast majority of the trail, and you’ll be glad you have all three!
- Dramamine for the boat shuttle if you are prone to sea sickness.
Here’s a more detailed list of what I carry in my backpack for most trips if you’re interested.
The Trans-Catalina Trail is truly a gem in the world of hiking trails. I loved the experience to reconnect with one of my best friends and soak in the beauty of one our country’s Channel Islands. It’s not an easy trail though and I was amazed at how steep some sections were, so make sure you’re well conditioned before hiking it!
Since there are many unusual planning aspects to this trail, I’ve created a consolidated “packing and planning checklist” if you’d like to download it. Just enter your email address below and you’ll have access to it along with many other free documents in my “Resource Library.” Feel free to ask more specific question in the comments section below. I’m happy to help with your planning!
[content-upgrade id=”4220″]
**My blog is a hobby and a labor of love. It’s essentially my way of “paying it forward” to the hiking community. Using the links in this post to purchase anything does not add any additional cost to you, but it does earn me a tiny commission to help offset the costs of running this website. I appreciate your support if you use them! And feel free to join my Facebook Group where I post good deals on hiking and backpacking gear each day as well as help newbie hikers get started with information about being safe and prepared for their first hike! 🙂
This post is so helpful! I hiked the TCT in December (it was my first solo backpacking trip!), and planning this hike was a challenge. I ended up hiking without a permit (even though I registered for one in advance) because when I called the Conservancy they told me that my campsite reservation was my permit. I still don’t know if I did the right thing or not. I would love to see the Conservancy re-route the trail and direct hikers to approach Parsons counter-clockwise from Two Harbors. Going down Fenceline Road (mile 29) is really treacherous! If I didn’t have a backpack I think it would have been safer to crab walk down the hill in that section! 🙂
Hi Katie! I completely agree with you about planning for this hike–current resources were a bit of a challenge to find. And yes, mile 29 is so treacherous! We were half laughing, half waiting to bust our butts and really get hurt down one of the longer hills! Glad you got out there and hiked it too–it’s such a treasure! 🙂